What to Do During Your First 3 Days on Shopify
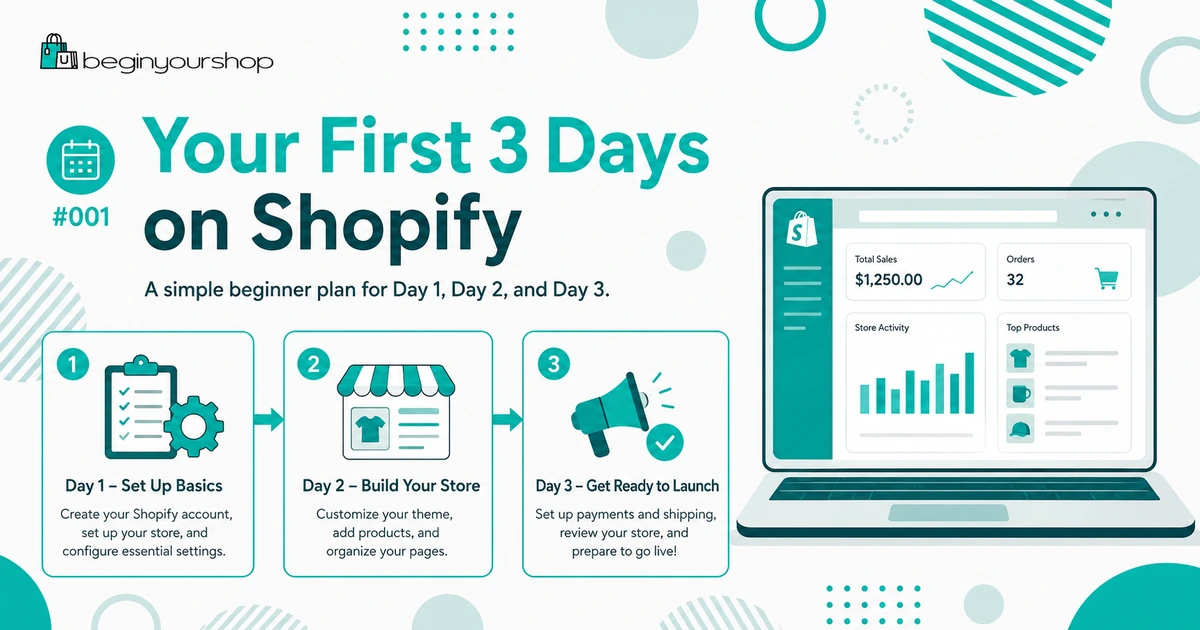
Your first 3 days on Shopify should not be spent endlessly changing colors, browsing apps, or comparing every theme. The goal is to turn your store idea into a clear working foundation: understand the admin, add real products, choose a simple theme, review payments, set up shipping, create essential pages, and test the buying flow before you think about serious traffic.
This beginner-friendly article gives you a practical 3-day Shopify plan so you know what to do first, what to ignore for now, and how to avoid wasting your trial period on low-priority tasks.
The first few days on Shopify can feel exciting and confusing at the same time. You open the admin, see products, themes, payments, shipping, domains, apps, analytics, discounts, markets, taxes, and settings — and suddenly a simple store idea feels like a long checklist.
The key is not to do everything immediately. The key is to do the right things in the right order.
Your first 3 days should help you answer three practical questions:
- Day 1: What am I selling, and can I set up the basic product and store structure?
- Day 2: Can the store look clear enough for customers to understand and trust?
- Day 3: Can a customer actually add a product to cart, reach checkout, and place an order without confusion?
This article gives you a focused 3-day plan for beginners. It is not about building a perfect store. It is about building enough of the right foundation so your Shopify trial becomes useful instead of overwhelming.
Last checked: May 1, 2026. Shopify admin screens, setup workflows, trial offers, payment settings, theme features, and launch requirements can change. Always confirm current steps in your Shopify admin and Shopify’s official Help Center.

Quick 3-Day Plan
If you want the short version, use this plan:
| Day | Main goal | What to complete |
|---|---|---|
| Day 1 | Build the foundation | Understand the admin, add products, create collections, review basic store settings, and map your store structure. |
| Day 2 | Make the store understandable | Choose a theme, customize the homepage, organize navigation, create essential pages, and improve product pages. |
| Day 3 | Check if the store can function | Review payments, shipping, taxes, domain, notifications, checkout, test order flow, and launch readiness. |
The goal is not to launch a perfect brand in 72 hours. The goal is to create a working store draft that helps you see what is missing.
Before You Start
Before spending time inside Shopify, collect the basic information that will make setup easier.
Prepare these items first
- Your store name or working brand name
- One short sentence explaining what the store sells
- Three to five products you can add as real examples
- Product images or temporary but realistic product visuals
- Product prices
- Basic shipping idea: where you ship and how orders will be fulfilled
- Basic return policy idea
- Support email address
- Domain idea, even if you do not connect it immediately
Do not start by installing apps or buying a paid theme. First, prove that your product, store structure, and checkout basics make sense.
Beginner rule: During your first 3 days, prioritize products, store clarity, payment setup, shipping setup, and checkout testing. Everything else can wait.
Day 1: Build the Store Foundation
Day 1 is not about making the store beautiful. It is about understanding the Shopify admin and adding enough real content to make the store feel concrete.
By the end of Day 1, you should have:
- A basic understanding of the Shopify admin
- At least one real product added
- A simple collection or product grouping plan
- Basic store details reviewed
- A rough navigation structure
- A list of missing product information
Understand the Shopify Admin
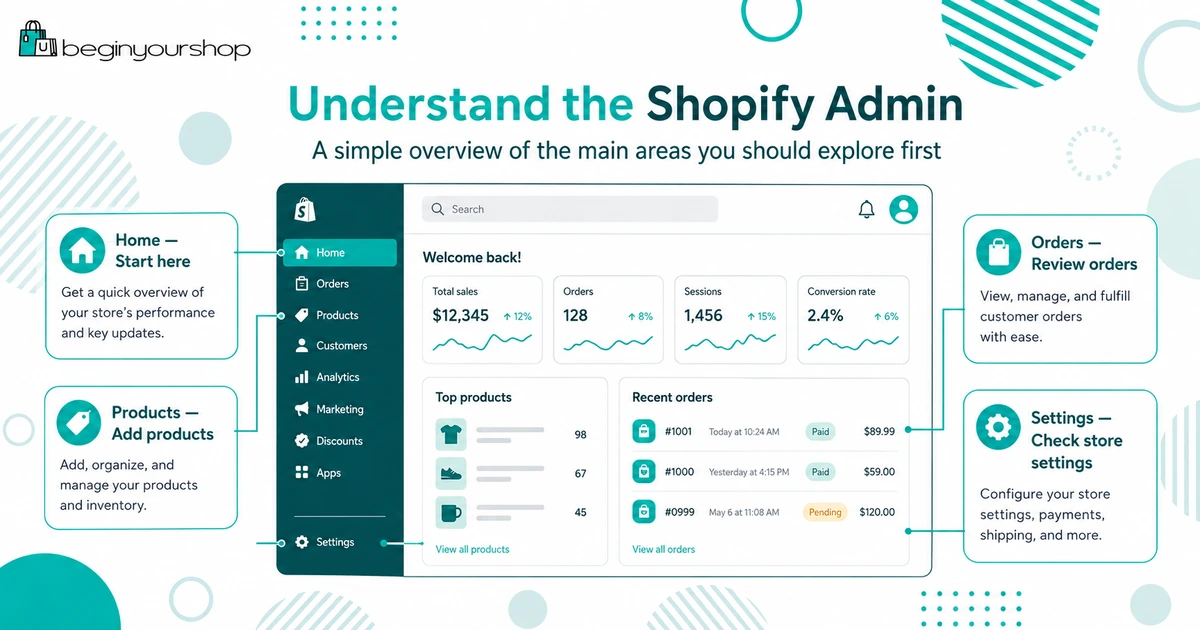
Spend the first hour simply learning where things are. You do not need to master every setting.
Focus on these areas:
| Admin area | Why it matters during the first 3 days |
|---|---|
| Products | You add product titles, descriptions, images, prices, variants, inventory, and SEO details here. |
| Online Store | You manage themes, pages, navigation, blog posts, and storefront preferences here. |
| Settings | You review payments, shipping, taxes, domains, markets, checkout, notifications, and store details here. |
| Orders | You will manage real and test orders here after checkout is configured. |
| Customers | You can review customer records after orders or customer accounts become relevant. |
| Analytics | You will use this later to understand traffic, sales, conversion, and customer behavior. |
| Apps | Useful later, but avoid app overload during the first few days. |
Shopify’s own setup guidance starts with practical basics such as adding your first product, trying themes, and setting up a domain. That order is useful because it keeps you focused on building a real store instead of exploring every possible feature.
Add Your First Real Products
Your products are the center of your store. A homepage with no real product content is hard to judge. A theme demo with perfect sample products can look good, but your real store depends on your real titles, images, descriptions, and prices.
What to add on Day 1
Start with one to five real products. For each product, add:
- Product title
- Short product description
- Price
- Images or realistic placeholder images
- Variants if needed
- Inventory quantity if you track stock
- Product weight if shipping depends on weight
- Product type, collection, or tags if you already know your structure
Do not worry if the descriptions are not perfect yet. On Day 1, your goal is to create real product pages you can improve on Day 2.
Use a practical product description format
For each product, write a description that answers:
- What is this product?
- Who is it for?
- What is included?
- What size, material, format, or specification matters?
- How should customers use it?
- What should customers know before buying?
Weak product description:
“High quality product. Great gift. Buy now.”
Better product description:
“This reusable glass water bottle is designed for everyday use at work, home, or the gym. It includes a protective silicone sleeve, leak-resistant lid, and wide-mouth opening for easy cleaning.”
Customers do not need clever copy first. They need clarity.
Create a Simple Store Structure
Once you add products, create a simple structure that helps visitors find them.
For a small store, you might need only:
- Home
- Shop
- Best Sellers
- About
- Contact
For a larger catalog, you may need collections such as:
- New Arrivals
- Best Sellers
- Accessories
- Gift Ideas
- Sale
Keep it simple. A beginner store does not need complicated dropdown menus unless the product catalog truly requires them.
Day 1 outcome
At the end of Day 1, you should be able to open your draft storefront and see real products inside a basic store structure. It may not look polished yet, but it should feel like a real store in progress.
Day 2: Make the Store Clear and Trustworthy
Day 2 is about presentation and trust. Now that you have products, you can choose a theme and shape the store around real content.
By the end of Day 2, you should have:
- A selected theme
- A basic homepage layout
- Main navigation and footer links
- Improved product pages
- Essential pages started
- A mobile review completed
Choose and Adjust a Theme
Do not spend Day 2 testing every theme. Choose a clean theme that fits your product type and catalog size.
Theme selection questions
- Does the product page make the product easy to understand?
- Does the collection page fit your catalog size?
- Does the mobile version look clean?
- Does the theme support your product images well?
- Can you customize the homepage without code?
- Can customers easily find the cart and checkout?
Most beginners can start with a free Shopify theme. A paid theme can be useful later if it solves a specific problem, but do not buy one just because the demo looks impressive.
Build a simple homepage
Your first homepage should answer four questions quickly:
- What does this store sell?
- Who is it for?
- Why should someone care?
- Where should the visitor click next?
A simple homepage structure can be:
- Hero section with a clear message and CTA
- Featured collection or product group
- Short benefit section
- Trust or story section
- Footer with policies and contact links
Create Essential Pages
A store with no About page, Contact page, or policy links can feel unfinished. You do not need perfect legal pages during your first draft, but you should create the essential structure early.
Pages to create on Day 2
- About: Explain what the store sells, who it is for, and why it exists.
- Contact: Give customers a clear way to reach support.
- Shipping Policy: Explain where you ship, processing time, and delivery expectations.
- Return and Refund Policy: Explain what customers can return and how refunds work.
- Privacy Policy: Explain how customer data is handled.
- Terms of Service: Explain basic site and purchase terms.
Shopify provides setup guidance around customer inquiry emails, policies, shipping, and launch preparation because these details affect trust and readiness. They are not decorative pages; they support real customer decisions.
Improve product pages
After selecting your theme, preview your product pages. Ask:
- Is the product title clear?
- Are images in the right order?
- Are variants easy to choose?
- Is the add-to-cart button visible?
- Does the product description answer common questions?
- Can customers find shipping and returns information?
- Does the page work on mobile?
Product pages should not feel like empty catalog entries. They should help customers decide.
Day 2 outcome
At the end of Day 2, your store should not only exist — it should be understandable. A visitor should be able to tell what you sell, browse products, read basic store information, and understand how to contact you.
Day 3: Review Payments, Shipping, and Checkout
Day 3 is where your store becomes operational. This is the day to stop polishing the homepage and start checking whether the store can actually work.
By the end of Day 3, you should have reviewed:
- Payment provider setup
- Shipping zones and rates
- Tax settings
- Checkout settings
- Order notifications
- Domain status
- Test order flow
Review payments
Go to your payment settings and check whether your payment provider is available, active, and correctly configured.
Confirm:
- Your business and personal information are accurate.
- Your payment provider is available in your region.
- Your bank or payout information is correct.
- You understand payment processing fees.
- You understand whether third-party transaction fees apply.
- Test mode is not accidentally left on when you plan to accept real orders.
Payment setup can involve verification. Do not enter fake or incomplete information just to move faster.
Review shipping
Shipping mistakes can block checkout or create unexpected costs. Review shipping before sending traffic to the store.
Check:
- Shipping zones
- Shipping rates
- Product weights
- Fulfillment locations
- Processing times
- Free shipping rules if used
- International shipping restrictions if relevant
If shipping rates do not appear at checkout for a customer address, that customer may not be able to place an order.
Place a test order
Shopify’s Help Center recommends placing at least one test order during store setup or whenever payment settings change. A test order helps confirm checkout, order processing, inventory, shipping, email notifications, and taxes.
Test this flow:
- Open your store as a customer.
- Add a product to cart.
- Select variants if needed.
- Apply a discount code if you created one.
- Proceed to checkout.
- Enter a shipping address.
- Confirm shipping rates appear.
- Confirm taxes display as expected.
- Complete the order using an appropriate test method.
- Check the order in Shopify admin.
- Review order confirmation emails.
Launch warning: A store that has not tested checkout is not ready for real traffic, even if the design looks finished.
Review domain and email
If you already have a custom domain, connect it and check that it loads securely. If you are not ready to connect a domain yet, at least decide what domain you plan to use before promoting the store.
Also test your customer support email or contact form. Shopify’s getting-started guidance recommends sending test customer inquiry emails so you can confirm that messages reach you.
Day 3 outcome
At the end of Day 3, you should know whether the store can function. If payments, shipping, checkout, order emails, and support contact are not ready, do not focus on advanced marketing yet.
What to Ignore During the First 3 Days
Not everything deserves attention immediately. Many beginners lose time by working on advanced details before the foundation is ready.
Ignore advanced apps
You do not need loyalty programs, complex upsells, referral systems, advanced analytics, heatmaps, and A/B testing during the first 3 days unless your business model specifically requires them.
Ignore perfect branding
You need a clear store, not a perfect brand system. You can refine typography, colors, imagery, and tone later.
Ignore advanced SEO
Do the basics first: clear titles, product descriptions, collection structure, page titles, meta descriptions, image alt text, and internal links. Advanced SEO can wait.
Ignore every marketing channel
Do not try TikTok, Instagram, Pinterest, SEO, email, ads, influencers, and affiliate marketing all at once. Choose one or two realistic channels after the store foundation works.
Ignore paid theme shopping unless necessary
A paid theme can be useful, but it should solve a real problem. Do not let theme shopping replace product setup and checkout testing.
Your First 3 Days Shopify Checklist
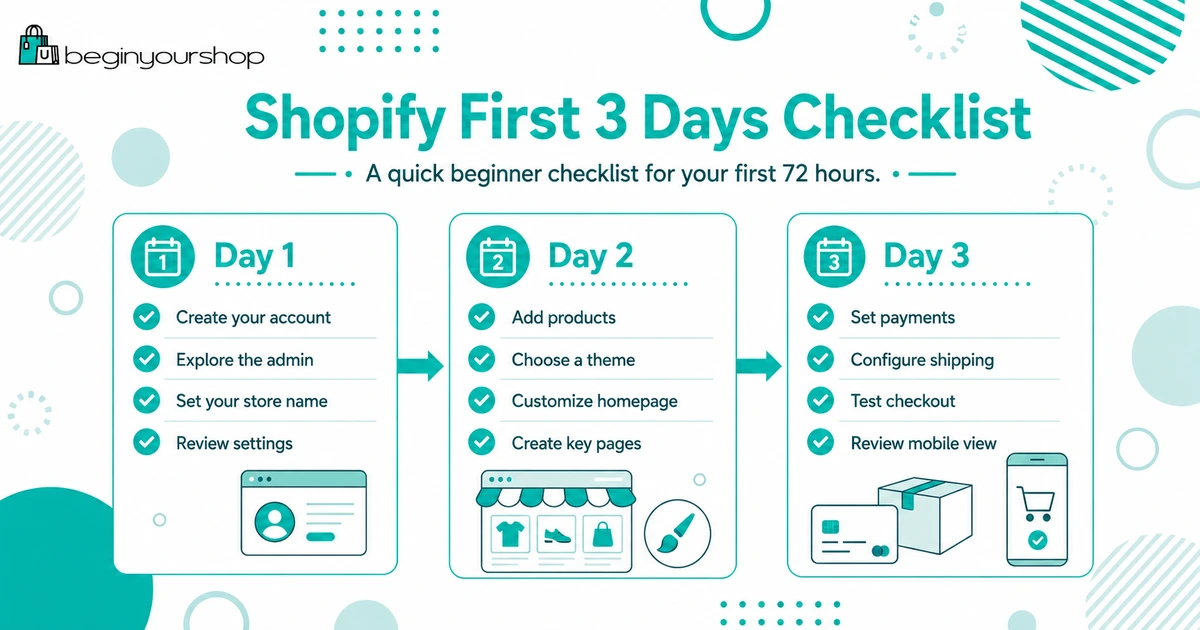
| Task | Day | Status |
|---|---|---|
| Review Shopify admin layout | Day 1 | To do |
| Add first real products | Day 1 | To do |
| Create simple collection structure | Day 1 | To do |
| Choose a clean theme | Day 2 | To do |
| Customize homepage with real content | Day 2 | To do |
| Create About and Contact pages | Day 2 | To do |
| Create or draft policy pages | Day 2 | To do |
| Review payment settings | Day 3 | To do |
| Review shipping zones and rates | Day 3 | To do |
| Test checkout and order emails | Day 3 | To do |
| Check mobile product and checkout flow | Day 3 | To do |
What to Do After the First 3 Days
After your first 3 days, you should have enough context to make better decisions. Your next steps depend on what you discovered.
If products are weak
Improve product descriptions, product images, pricing, variants, and product organization before worrying about advanced design.
If the store is unclear
Improve the homepage message, navigation, collection structure, and About page.
If checkout has issues
Fix payments, shipping, taxes, discount codes, and order notifications before sending traffic.
If the foundation works
Then move into launch preparation: connect a domain, finalize policies, test on mobile, set up basic analytics, and choose your first traffic channel.
For a deeper setup process, read our guide: How to Start a Shopify Store.
FAQ
Can I build a Shopify store in 3 days?
You can build a basic working store draft in 3 days if your product information is ready and your store is simple. A polished, fully optimized store usually takes longer.
Should I launch my Shopify store after 3 days?
Only if products, payments, shipping, checkout, policies, mobile layout, and support are ready. The 3-day plan is mainly for building and testing the foundation, not rushing a public launch.
What should I do first after starting a Shopify trial?
Start by understanding the admin, adding your first real product, trying a simple theme, and reviewing store settings. Avoid installing many apps immediately.
Do I need a paid theme during the first 3 days?
Usually no. Most beginners should start with a clean free theme unless a paid theme solves a specific product page, catalog, or design problem.
Should I install apps right away?
Only install apps that are required for your business model, such as print-on-demand, digital delivery, product options, or fulfillment. Delay advanced marketing and upsell apps until the store foundation is ready.
Do I need to set up a domain immediately?
You do not need a custom domain in the first hour, but you should plan your domain early. Before serious promotion, use a custom domain and set it as your primary domain.
Why is a test order important?
A test order helps confirm checkout, payment settings, order processing, inventory, shipping, email notifications, and taxes. It is one of the most important checks before launch.
What if I do not have product photos yet?
Use realistic temporary images only for internal setup, but do not launch with poor or misleading visuals. Product images are important for trust and conversion.
What is the biggest mistake during the first 3 days?
The biggest mistake is spending all your time on design while ignoring products, payments, shipping, checkout, policies, and mobile usability.
What should I do after the first 3 days?
Improve weak product pages, finalize store policies, connect your domain, test checkout again, review mobile experience, and choose one realistic traffic channel to start with.
Final Thoughts
Your first 3 days on Shopify should be practical. Do not try to build a perfect brand, install every app, master every setting, or launch ads before your store can function.
Use Day 1 to build the foundation, Day 2 to make the store understandable, and Day 3 to check whether payments, shipping, checkout, and order communication work.
Once the basics are clear, you can improve design, content, SEO, apps, and marketing with better judgment. A simple working store is more valuable than a beautiful unfinished one.
Next recommended guide: Shopify Launch Checklist
Shopify Basics, Beginner Tips, Store Setup